January 2017 Update

January 15, 2017

Time off from work or school has long brought with it the promise and the pressure of making something cool – making progress with my projects. More often than not these breaks have yielded somewhat disappointing results in terms of productivity, and so exceptions like this past winter break stand out brightly.

That’s a rather long-winded way of saying that I got some stuff done on the layout over Christmas.

The River Valley Gets A Bridge

Practically all of my layout energy went into the river valley (formerly referred to as the “back left area”), which has transitioned from prototype cardboard profiles to a basis for real scenery: a plywood riverbed, pink foam banks and cardboard webbing. This area continues to be gratifying to bring to life (it’s featured prominently in the video below).

In addition to pink foam, the valley now has a real bridge. I chose the MTH Steel Arch Bridge and I’m trying out salt weathering on it. I first learned about this technique from Eric Siegel’s YouTube channel, but there are numerous other examples on YouTube. The steps are simple:

  1. Paint the model a rusty base coat
  2. Spray with water and apply sea salt liberally where you want a corrosion effect. As the water dries the salt sticks (quite well, actually)
  3. Paint a second color on top.
  4. Chip off all of the salt and you are left with the rust showing through.

Chipping the salt off can be a very time-consuming process, especially for a structure as complicated as a bridge, but I think the results were pretty good. For the second coat I chose a deep red, which unfortunately means that the effect is somewhat subtle (especially in photographs), due to the similarity of the two colors – rust vs. red.

Progress Video

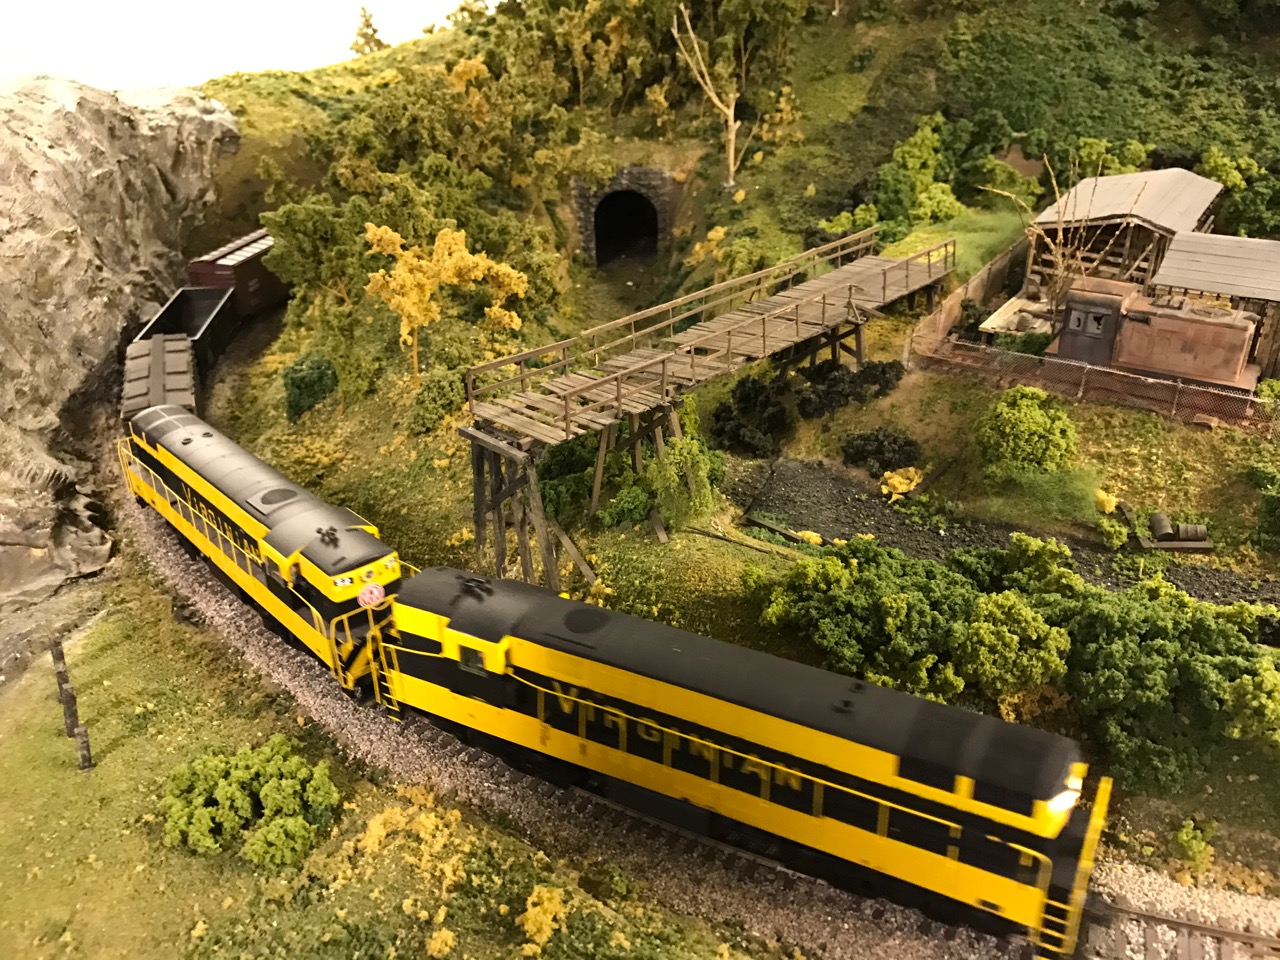
To mark the progress of the past few weeks, I made a video of W&LE 8002 pulling a consist of six B&O passenger cars. Think of it as an “excursion”. The video starts in the lower return loop and follows the train all the way up to the upper return loop, where it crosses the bridge:

Shifting Landscape Building Techniques

For a few years now my plan for creating the shape of the landscape has been to stack layers of carved pink foam. While using this approach on the river valley, however, I’ve come to the conclusion that it’s simply too slow (and, my god, messy – static-y pink foam sticking to everything) for me, at least for mountainous landscape. Perhaps it has something to do with perfectionist tendencies, but it takes a lot of energy to select the right piece of foam for each layer, then carve the piece to my liking, and so forth. So I’m trying something different.

Many times I’ve looked to Rich Battista’s excellent Black Diamond Railway series for inspiration. In the first volume he demonstrates his basic mountain building technique which is essentially to ball up craft paper, tape/staple it into place, add plaster sheets, and then adorn with molded plaster rocks. It looks to be very fast, and it offers a lot of control.

As much as I love the results on his layout, the thought of great big damp wads of paper under my landscape is just not that appealing (damp from the wet plaster sheets, and the water sprayed on from his excellent approach to rock mold blending). So my plan is to use foam to build the base and back profile (against the backdrop) of the landscape, and the classic cardboard lattice covered in plaster sheets (and molded plaster rocks) for the actual surface.

Next Up

I expect that I’ll remain pretty focused on scenery in this area for the next few weeks. I ordered tunnel portals and bridge abutments. I expect to start applying plaster relatively soon, although before I get too far into that I need to build out the tunnel interiors for that area.

In my last post I mentioned that I was working on signals. My wife gave me a Raspberry Pi for Christmas, which will make a great nerve center for the signaling system (I like the thought of being able to SSH into the signal system). I haven’t made much more progress in this area, however.

Comments

December 2016 Update

December 14, 2016

The Layout as of December 1 2016.

The layout is coming along quite nicely. Fortunately for the layout, I’m much more consistent about working on it than I am in writing about it here.

What’s New

There’s been a great deal of progress since August! The main line, which is terminated by reversing loops on either end, has been complete since November, and trains can run the entire length. Two passing sidings allow me to have two (or I guess three) trains on the track, although this amount of mental juggling is not something I attempt often.

Aside from the sub-roadbed and track work, the backdrop has grown significantly and received a coat of primer paint. The photo above was taken a couple weeks ago; as of this weekend the backdrop has made it around to the corner at the left rear of the room. One more 4’ section remains.

The backdrop has been a challenge. It’s made out of 2 foot tall panels of hardboard (Masonite). The most time-consuming part of this has been in smoothing out the seams between the pieces. I’m using drywall joint compound to do this, and I’ve learned that my skills with drywall mud have a long way to go. For some of the seams I tried using paper tape, but it’s taken a very long time to smooth over the ridge that the paper tape formed. Perhaps after it’s all over I’ll have something to share. At any rate, once I get the seams smooth I’ll be able to finish painting it, and then I’ll be able to get started on roughing in scenery, hopefully by the end of the year.

One of the areas I’m most excited to start work on is in that back left area. I’ve used cardboard to sketch out the profiles of the mountains in this area and I’m really happy with how it’s looking. A closer look:

Playing with river valley profiles.

The dip in the center represents the river, which flows toward the camera, from up around the bend to the right. The track of follows the river, of course. I had formed an idea in my head of what I wanted in this area, but prototyping it with cardboard really helped it come to life. The two lengths of elevated track in this photo are the upper return loop. The one in the foreground will be a bridge.

I had been planning to build a backdrop down the center of the smaller peninsula. I even wrapped another piece of hardboard around a tube to make the endcap, but after temporarily assembling that section of backdrop I decided not to proceed. These floating backdrops chop up the room of course, and in this case I didn’t think it was worth it. So the challenge will be to develop scenery that logically separates the two halves of that peninsula (as they are not intended to be geographically back to back). Being able to look out over a wider, unbroken landscape will be nice.

Visitors

We’ve had a fair number visitors to the layout over the past few months. It’s been fun to see how people respond to it. In particular it’s cool to see some pull out their phone to take a picture.

I’m also learning how to “entertain” guests with the layout. Yes, you run the train, but with a single track main the action can be somewhat limited, with only one train moving at a time. (Trying to make oneself available to talk to people is not a good time to attempt to move two trains around the layout simultaneously. I need a crew…) Still, I would do well to remember what I said about Tom Brennison’s layout: limited action allows visitors to take in the details. This will be more of a long term goal – my layout has no details yet.

Perhaps half of my visitors are friends’ kids. I try to make sure they get to blow the whistle on the big trains, or I’ll tuck the big train safely away on a siding and let them run our Thomas LionChief train around. Thomas can handle flying off a curve at full speed a lot better than the big trains. I’d love to find a way for them to run the big train. Perhaps using the speed limit feature would be sufficient.

What’s Next

I’m looking forward to getting started on some scenery. The base backdrop needs to be finished first, however. Also, although the mainline and major passing sidings are complete, none of the industry sidings and spurs are. They still need to be planned beyond sketches or general notions in my mind.

I’ve been doing some preliminary work on signals. The present plan is to use an isolated rail for block occupancy detection and an Arduino or Raspberry Pi to make the logic work. It’s been fun to prototype it out on the Arduino. Here’s a little video I made testing out opto-couplers for isolated rail occupancy detection:

More on that in a future blog post.

Lastly, this railroad really needs a name. I’ve been trying out names for the towns/areas; perhaps I will do the railroad thing and name it for the towns that it serves. Until next time!

Comments

A Visit to The New River Valley Railway

November 20, 2016

Today we had the pleasure of visiting Tom Brennison’s New River Valley Railway. It was on the last day of this year’s Piedmont Pilgrimage and a friend told me that Tom’s railroad needed to be seen, so we loaded up the family and headed south to Fayetteville.

The New River Valley Railway is modeled after southwest Virginia, where Tom grew up. It’s a wonderfully sprawling HO railroad, with small towns and industries joined by green river valleys, hills, and mountains. There’s an abundance of elegant and intricate trackwork, enough that I was surprised to learn that the overall track plan is a single-track main with two passing sidings.

A lone Virginian train was making its way along the mainline while we were there. I’ll admit that I was initially disappointed by this, but let me tell you that there was no shortage of interest: there is so much to see on Tom’s layout that in retrospect I think it was better to have less action. It allowed us to focus on the details – and there are many – rather than being distracted by the train action.

A few notes on the details:

  • I was impressed by how varied the landscape was. Some layouts have very discrete levels on which the track runs, but I felt like Tom had done an excellent job of making the terrain and its transitions feel very natural (something which I would like to emulate on my own layout).
  • The areas entering a tunnel portal tended to be very nicely done. The range of bridge styles represented was also fun.
  • Two other favorite scenes were great examples of modeling abandoned trackage - one of them can be seen below.
  • We should have gotten a babysitter and brought the “good” camera.

Hopefully the New River Valley will be on the Pilgrimage in coming years – a repeat visit would be well worth the drive, and obviously I’d strongly recommend you visit as well. Until then, you can see a bit more of the layout in this NMRA YouTube video.

Tom was an outstanding host, making himself available for questions, generously explaining how his signalling system worked (and even showing the circuitry), and volunteering interesting details. Thank you, Tom!

Comments

Planning

August 11, 2016

We moved last summer, and with that move came an opportunity to build a new layout in a new space. I built three layouts at the old house (none of them got past track-on-plywood benchwork). The space in the new house is 32 feet long by 13 1/2 feet wide – wonderfully large, but it proved to be quite a challenge to design for. I think that smaller rooms have fewer options, especially with a larger scale like O. With a large (for me) room like this, the possibilities multiply.

It took about six months for the dust to settle from the move, and from that point a few months of layout design failures followed by a few weeks of false positives. One day: “This is the layout I will build!” Two days later: “This isn’t good enough.”

Around this time, I was frequenting the excellent Model Railroader Video Plus, and came across two layouts that really resonated with me. The first was Tom Piccirillo’s Somerset County Traction System (O scale, MRVP link, track plan, photos). The second was Gerry Leone’s Bona Vista Railroad (Mark III) (HO scale, YouTube walkthrough).

Somerset County’s gently winding track plan is lovely, and it was inspiring to see that great scenes can be made in O scale with relatively little depth. Like many I’ve always wanted to build a layout with a great big yard, but in O that requires a massive amount of space. Your layout tends to be about the yard itself. Over time I’ve come to think that a shortline with several passing sidings and spurs allows for more interesting modeling and operation, given the constraints. It’s more about the journey than the destination, right? Tom’s layout exemplifies this.

The Bona Vista was a more direct inspiration for two reasons. First, Gerry’s layout space somewhat resembled my own (even though his layout was HO). Second, his track plan was delightful: clever and surprising. I like layouts that take a while to figure out what’s connected to what. The way that the Bona Vista curled around on itself and popped out and back in – a point to point without looking like it – was exactly the sort of effect I was looking for.

So I set about essentially adapting the Bona Vista to my space. It didn’t fit (it would have needed a space closer to 32x32), but I managed to come up with something that I think will work rather well. I adapted it by running one of the return loops through a wall into the next room to make it fit, but that’s okay. Right?

Here’s my high level track plan. Green shows the edge of the benchwork; blue is the backdrop.

March 2016 Layout Plan

It’s a point-to-point with a return loop at each end (not shown is a return loop underneath the large upper peninsula). At this point only the shape of the mainline is set. The four towns are less plans and more sketches of what’s possible in those spaces. I’ll build the mainline and then come back and cut in the siding and spur switches once I have a better feel for it in real life.

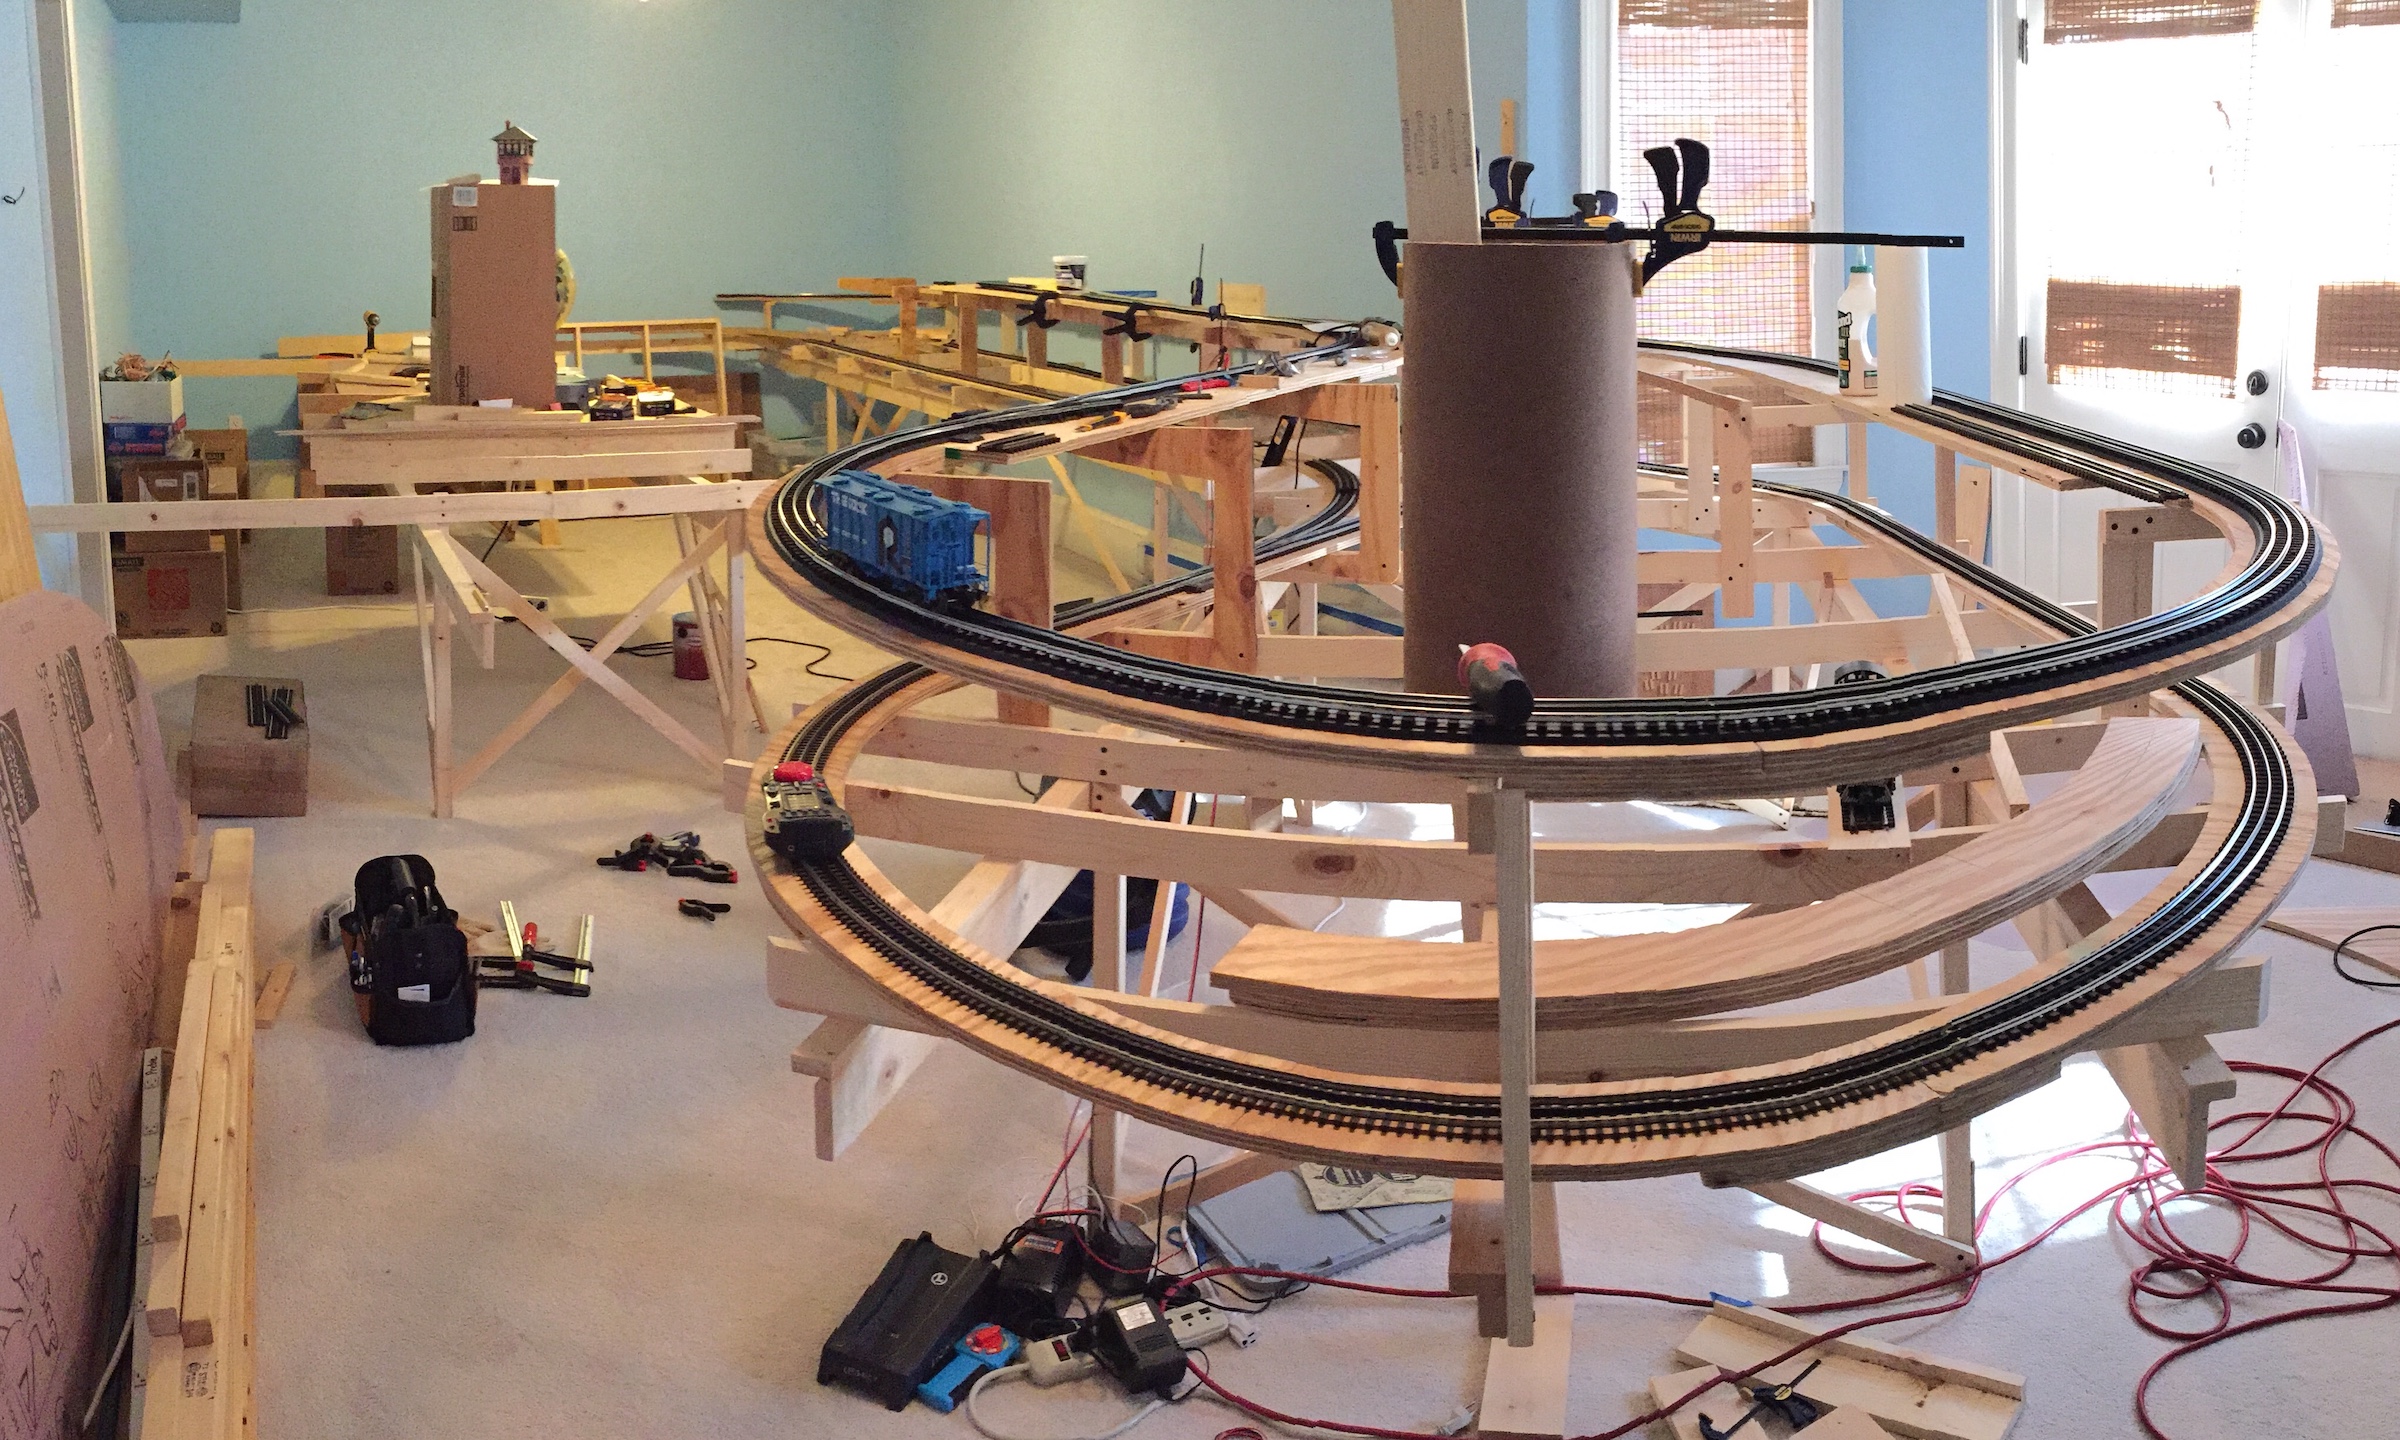
Construction progress as of mid August 2016.

(Panorama stitching made my curves look terrible. They are smooth, I assure you.)

Construction has already begun; I’d estimate that I’ve got about 30% of the benchwork built, and maybe 25% of the track. Work practically ceased during the summer, but I’m starting to ramp back up on it now.

Perhaps you are wondering about the era, location, and theme. To be frank I don’t have much railroad knowledge to draw on here, so the best I’ve got is that it will be based on a fictional shortline in the southern Appalacian foothills. Probably transition era, as I’d like to run both steam and diesel.

There’s more I’d like to say – about trackwork, lighting plans and so forth – but in the interests of actually publishing a post (as I have intended to do for many months now), I’ll save those topics for future posts and end it here. Thanks for reading.

Comments

Progress Update 5

September 8, 2013

I started cutting ditches and laying roadbed over the past couple weekends (I tweeted a photo). It’s gone fairly well but it’s tricky to get the center line of the track just right so that the roadbed matches up (the roadbed tears down the center and is applied to each side individually). I’m marking the center of the track on the foam base, which is error-prone because there’s this goofy center rail in the way.

While I’ve had a few trestle bridge bents built for, well, months now, I haven’t made much progress. There’s been a lot of strategizing, which is code for staring at it and wondering how on earth I’m going to do it. For a first trestle it’s pretty daunting, primarily because it’s curved, and also because there’s no symmetry to it. So I waffle back and forth on how to make the bents the correct height for the [in progress] terrain.

Searching for inspiration, I came across Lex Parker’s excellent Building a Wooden Trestle series. While much of it isn’t directly applicable to my situation (extruded foam construction vs Lex’s thin shell; Lex is laying his own ties and rail) I think it did send me in the right direction. Plus there’s tons of other great inspiration in the series, as well as in his other clinics. I wasn’t familiar with Lex’s work but that’s likely only due to my newness; you don’t have skills like his (and YouTube videos) without having some notoriety.

Lex’s videos made me start to ponder how I’ll handle my mountainsides and rock faces. He uses latex rock molds and plaster, Eric Siegel uses geodesic foam resin (see also: Bragdon Enterprises) reinforced with window screen, and Evert does great things with just extruded foam. In the short term I’ll stick with going the foam carving route. If I don’t get the results I want I can shift to rock molds later.

Comments